As an Amazon Associate, we earn from qualifying purchases. That means that if you go through one of our affiliate links to make a purchase (each is marked below with two asterisks**), we may earn a small commission at no additional cost to you. Thank you for your support! All opinions and reviews here on Grow Adventures are independent and reflective of our own personal use and belief in the quality and usefulness of the products and services we recommend. Please read our disclosure for more information.
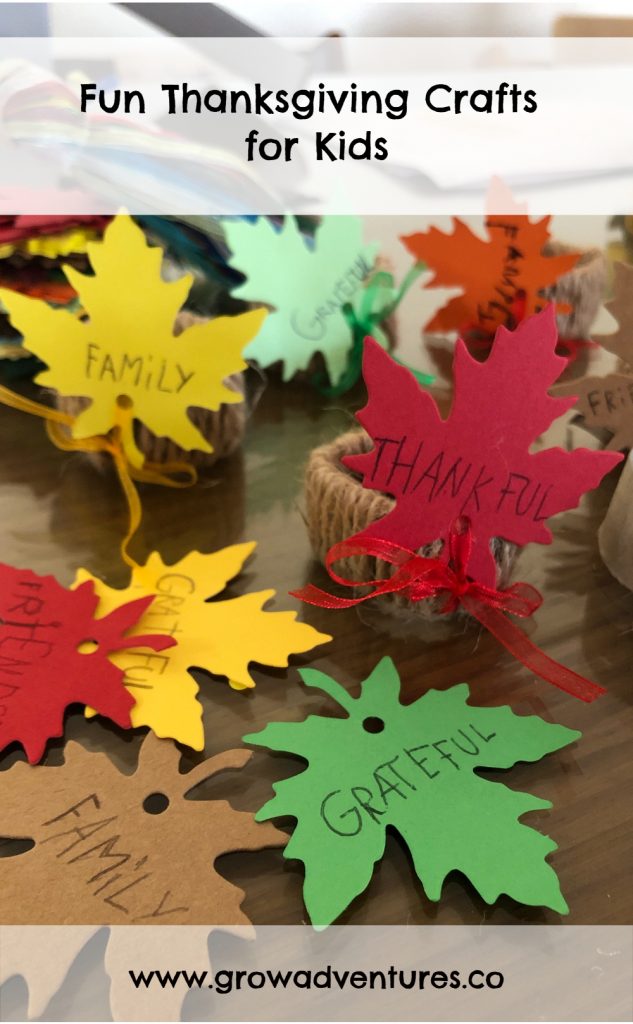
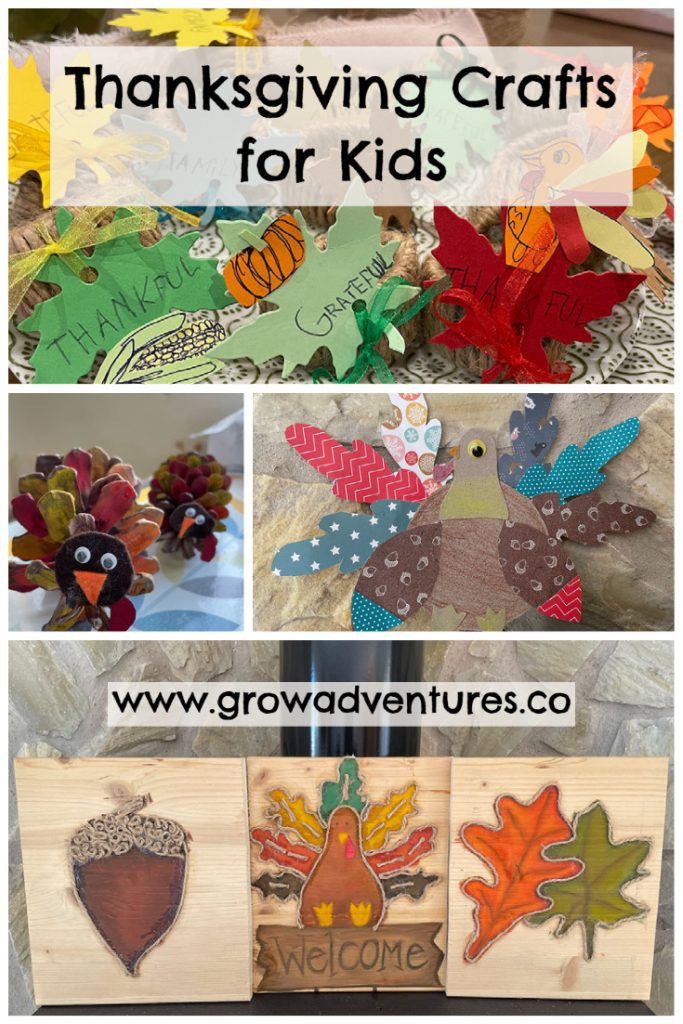
Thanksgiving is almost here! Below you’ll find a few Thanksgiving crafts for kids we’ve been working on this past week. We’re working on a few others and will share the results of our projects soon!
Check out our list of recommended arts & craft supplies to have on hand so that you’re always prepared for impromptu arts & craft activities!
Thanksgiving napkin holder craft for kids (age 5+)

We were looking for ideas for Thanksgiving/autumn themed napkin holders and liked these construction paper ones, these pipe cleaner ones, and these jute twine wrapped ones.
I am a HUGE fan of versatility and multi-purpose functionality. So we went with the jute twine option plus some embellishment. They look classy and can be reused for other occasions. We tied on (not glued!) our Thanksgiving themed embellishments to the napkin holder so we can quickly untie the bow and voila, the napkin ring holders can be used for Christmas 🙂
We decided to go with these pre-cut leaf gift tags** and the kids wrote a few Thanksgiving themed words like Thankful, Grateful, Family and Friendship.
Feel free to add extra details like our daughter did by adding a turkey, a corn cob and a pumpkin!

Jute Twine napkin holder materials

- Scissors
- Toilet paper rolls
- Natural Jute Twine**. Cut a length of approximately 34 inches (86cm) to wrap each toilet paper roll section. You can opt for a thicker Jute Twine/Cord for a different look, though I recommend the thinner one since it’s multi-purpose and can be used in other projects, even to wrap presents.
- Glue stick (hot glue gun would be faster but I prefer glue sticks so the kids can work the project on their own).
- (Optional) Colored leaf shaped gift tags**, neutral color leaves** or other decor of your choice
- (Optional) Colored Card stock** or construction paper** (this set includes fun stencils and shapes) to make fun embellisments like a turkey, corn cob, pumpkin etc. We recommend the heavier 65lb weight as it helps the crafts keep their shape better, but you can opt for lighter weights like 24 pound card stock or construction paper. Just know that the larger the craft, the flimsier the result is.
Jute Twine napkin holder instructions
- Cut each toilet paper roll in 4 evenly sized rings. We found it easiest to cut the toilet paper roll first in half, then each piece in half again for a total of 4.
- Slather lots of glue to about a quarter of the toilet paper ring (both inside and outside)
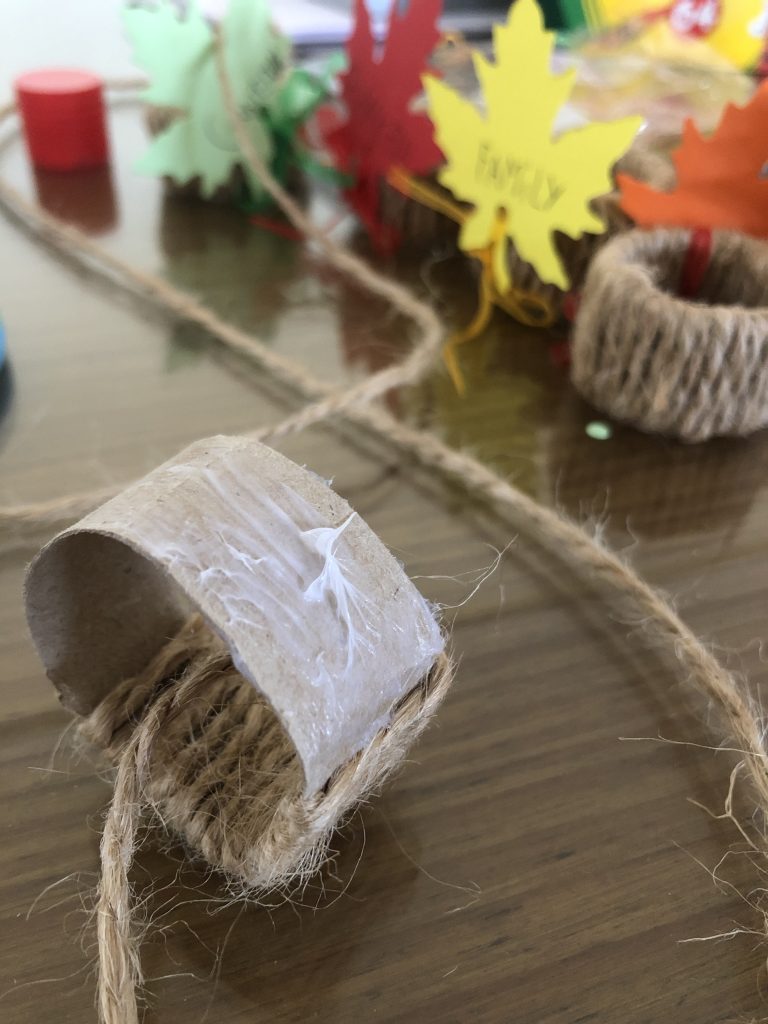
- Stick the end piece of the jute twine inside of the ring and start wrapping it around the toilet paper ring.
- As you wrap, make sure to keep the jute twine tightly wrapped next to each other so there are no gaps (otherwise, you will see the toilet paper roll).
- When you get to the end, cut off any excess twine, if any, and finish by securing the end piece inside with more glue.
- You can leave the napkin ring as is (it’s gorgeous!) or feel free to further embellish. We added cardstock leaves with Thanksgiving sentiments and my daughter added a turkey, corn cob and a pumpkin. TIP: Do NOT glue the decoration to the napkin ring. You can tie on any decorations you’d like and remove them later so you can use the napkin ring again for another occasion, like Christmas!
Important to note:
- Wrapping the jute twine takes time. Our daughter did 2 on her own and decided it was more fun (and less sticky!) to just decorate the leaves and create other decorations to embellish the napkin holder while I finished wrapping the other rings. I didn’t mind since after doing 1-2, I got into the groove and was able to wrap about 6 in half an hour. We made 12 so we spread the work across two separate days.
- Make sure that you spread enough glue onto the toilet paper roll so that the jute twine can stick to it, lays flat, and does not separate from the roll, leaving an unsightly gap.
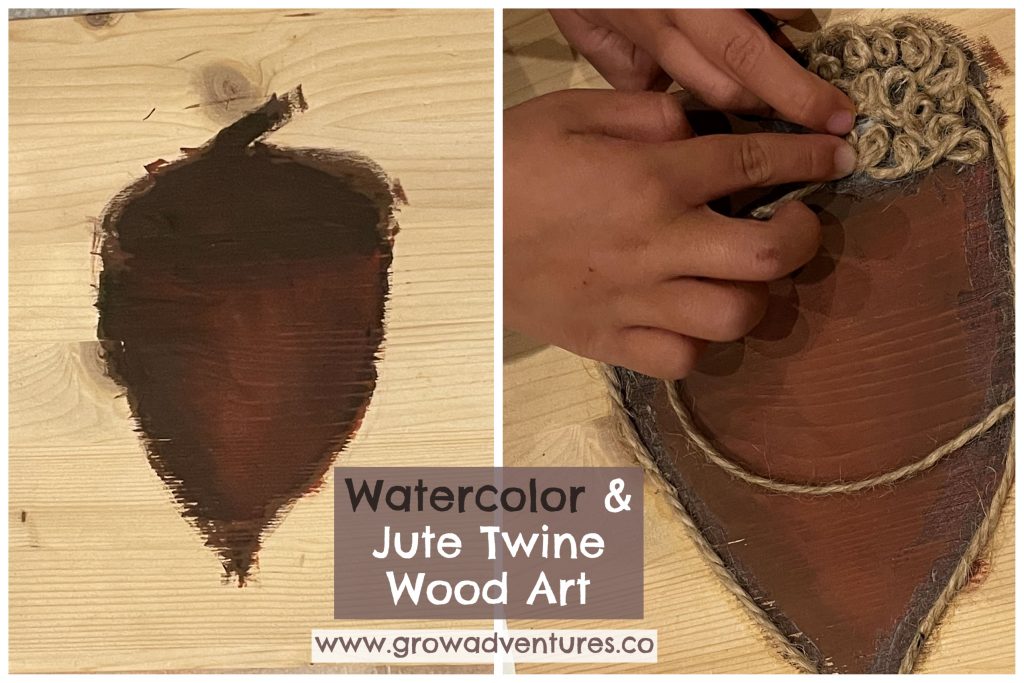
Autumn Mixed Media Scrap Wood Art for Kids (age 3+)
We love mixed media art! We were originally inspired by this painted pumpkin with jute twine.
My husband cut up a piece of scrap wood into three pieces so that the kids (and me!) could each create something.
We didn’t feel like replicating the pumpkin we saw. So our daughter chose to paint her own acorn and twisted and glued on the jute twine to make the acorn cap.
Mixed Media Scrap Wood Art for Kids materials
- Leftover piece of wood
- Watercolor paints. We recommend a fun palette** like this for kids, though we used this set** for this project. It’s not meant for kids but you get lots of vibrant, long-lasting colors in a metal tin case. It has outlasted several child-specific paint kits I’ve purchased for the kids. It has lasted us through years of use. I even painted my DIY corpse bride dress for Halloween with these paints and crayola markers.
- Natural Jute Twine**
- Large glue stick (we went through a whole large glue stick)
Tips
- Use pencil to sketch out what you want before you start painting to ensure the right proportions.
- Since we are using watercolors and not acrylic paint (though you can if you’d like!), you need to paint on several layers to make it more vibrant. This also gives it dimension!
- Slather lots of glue along the lines where you want to add jute twine. Again, we used glue stick here which works absolutely fine but you can use a glue gun if you prefer.
- If you want to make an acorn, and you feel like it’s too much work, you don’t need to twist the jute twine. You could just paint it, or loop the jute twine back and forth across. We chose to twist the twine to give it more of a 3D look that resembles the little bumps and divets on a real acorn cap.
Our son wanted to paint leaves. At some point he got bored and left so I completed them with my daughter. That night, I painted the Welcome Turkey and my daughter added the twine the next day. Didn’t they turn out nice?

Pinecone Turkeys (2+)
These are super adorable and easy to make.

Pinecone Turkeys materials
- Pinecone(s) – one for every turkey you want to paint
- Watercolor paint. Same as above. Fun palette** we recommend for kids though we find this set** works well for us.
- Felt or colored paper
- (optional) googly eyes (though googly eyes are fun, if you don’t have any on hand, you can make some by drawing pupils on round white pieces of paper in a pinch!).
Pinecone Turkeys instructions
- Make sure to stand your pinecone on the table and choose the top side and bottom side (bottom side should support the pine cone to stand upright and not roll around)
- Paint the top and sides of the pinecone in various colors. We stuck with the typical red, orange and yellow (you can paint the bottom too but it’s not necessary)
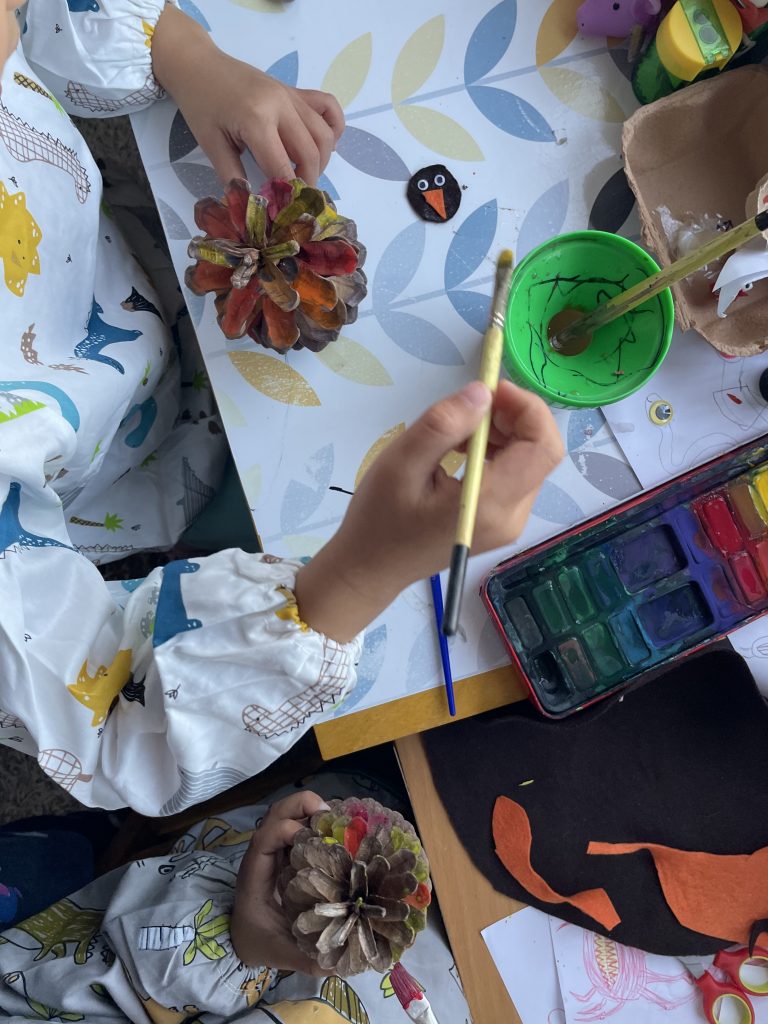
- Set pinecone aside to dry.
- Cut out a circle for the head, a triangle for the beak and a red “gobble”.
- Stick the googly eyes, beak and gobble to the head.
- Glue the head to the pine cone. We looked for a good place where the head could have a couple touchpoints with the pinecone and added glue.
Easy Patterned Turkey Craft for Kids (age 3+)
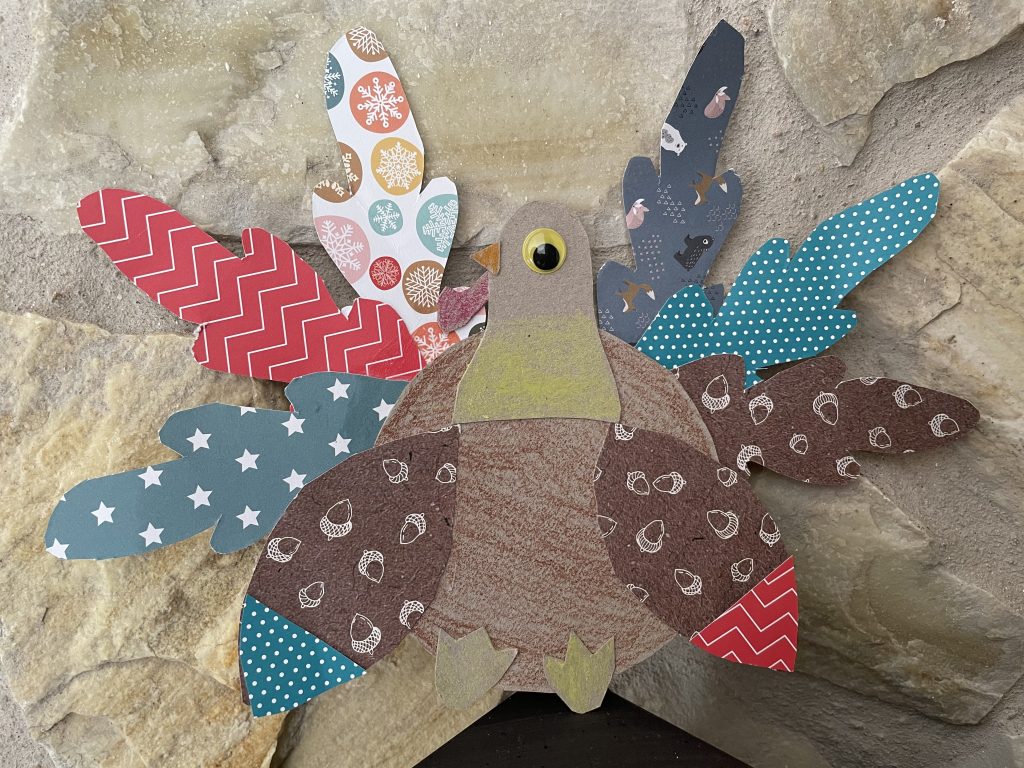
We were inspired by these beautiful placemats** and decided to glue together different patterned cardstock to make our turkey.
I really enjoyed this because it was a deviation from the typical Thanksgiving turkey colors used in children’s art like red, yellow, orange and brown. We only had winter themed patterned cardstock at the time but it still ended up beautiful!
Easy Patterned Turkey Materials
- Any type of plain cardstock/cardboard (even the inside of a cereal box will do!) for the body, head, wattle and feet
- Patterned card stock/paper for the wings and tail feathers
- Don’t have themed patterned cardstock on hand? Don’t fear. You can use anything with patterns on it, like patterned origami paper that you can glue/tape to cardboard/cereal box type materials. You can also just use markers or paint and decorate the plain cardboard/cereal box with whatever patterns your child’s little heart desires!
- If you don’t want to freehand it, feel free to use our free turkey stencil.
- Googly eyes OR just draw some on the head!
Easy Patterned Turkey Instructions
- Drawing freehand or using our free turkey stencil, draw/print out your turkey body parts. TIP: We recommend that you put all the body parts (except wings and tail feathers) on plain white or cardboard paper, which you can color. This gives your turkey some contrast (colorful, patterned wings and feathers against the more plain body)
- Draw, or trace (if using our stencil), enough pieces to make your turkey. 1 head, 1 turkey belly, 1 beak, 1 wattle, 2 feet, and we recommend a minimum of 6 tail feathers (ours resemble leaves but feel free to use whatever shape you’d like!).
- Decorate the wings and tail feathers using patterned paper or draw your own design!
- Cut all the pieces out (your child may need help, depending on their age/skill with scissors).
- Glue all the pieces together to form your turkey.
Other Thanksgiving crafts we have on our radar to try next
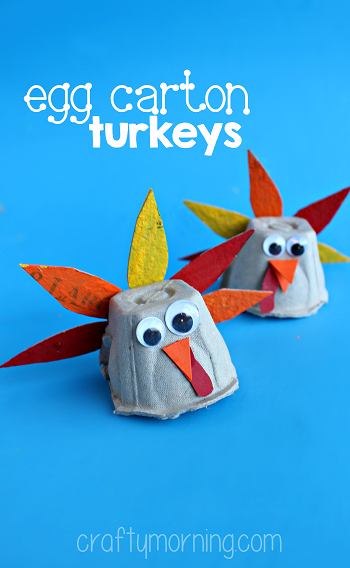
Egg carton turkeys from Craftymorning. Our kids love all egg carton crafts – especially ones involving paint and google eyes. This is no exception!
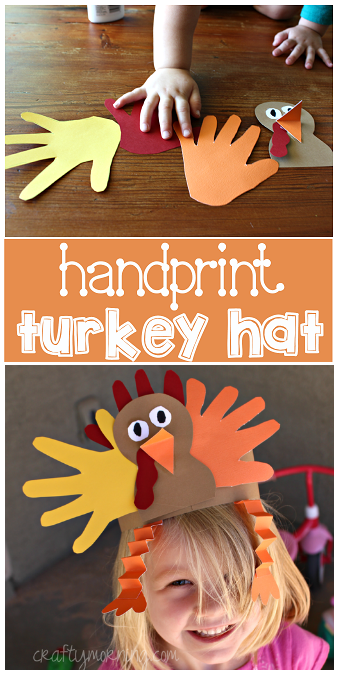
Handprint Turkey hat from Craftymorning. We actually made these last Thanksgiving at our friends home and the kids loved wearing them, especially with the little legs dangling down.
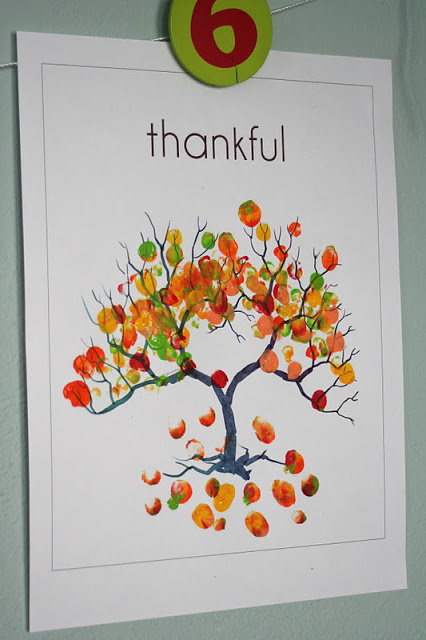
We’d love to try Littlepageturners leaf print and fingerpaint tree! For a free tree printable, check out this beautiful one that CraftsonSea shares.
Painted Thanksgiving message rocks from HandmadeCharlotte
I love this idea of painting rocks with a message and/or using them as gratitude rocks.

Want a free Thanksgiving coloring book printable for your child? Sign up here and we’ll send it to you!
What Thanksgiving crafts have you tried? Share your ideas with us below. We love hearing from you!
Leave a Reply